ClashX Download Guide | User Tutorial | Complete Node Subscription Configuration Guide
ClashX Download Guide | Complete Tutorial | Node Subscription Configuration Strategy


ClashX is the graphical client for the proxy tool Clash on macOS (Apple computer system). It is a powerful proxy software that supports multiple proxy protocols, such as V2Ray, Trojan, Shadowsocks(R), Socks, and other protocols.
ClashX Download
bannedbook/ClashX: ClashX is a MAC system VPN tool based on the Clash kernel.
ClashX Installation
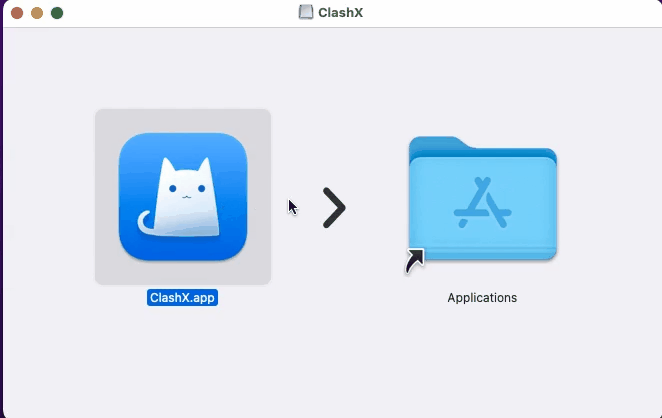
Download the ClashX installation file, which is in .dmg format (equivalent to a disc image file). Simply double-click to run and install it. When running the ClashX installer, a virtual disc will be created on the desktop, and the downloaded image file will be mounted to that disc. A window will pop up prompting you to drag to complete the installation; follow the instructions to drag the [ClashX] icon from the left side of the window to the [Applications] folder on the right side, completing the installation of ClashX.
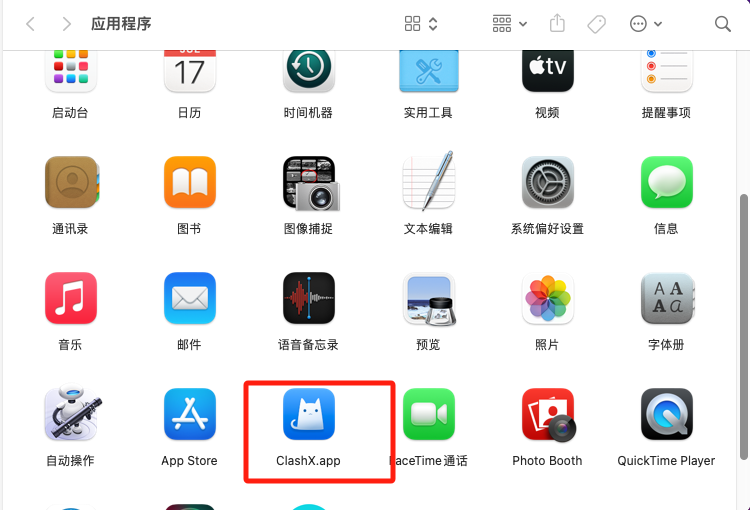
The installation process is essentially copying the ClashX program folder to your Mac computer, placed in the [Applications] directory for convenient access and use of the application. After the copy is complete, you will see the ClashX application icon in the applications folder, indicating successful installation. You can then eject the virtual disc and delete the dmg file from your download folder.
Installing applications on macOS is much easier than Windows programs. Each application can be understood as Windows portable software that can be executed directly without requiring much configuration. When you see the ClashX icon in the [Applications] folder, the software installation is complete.
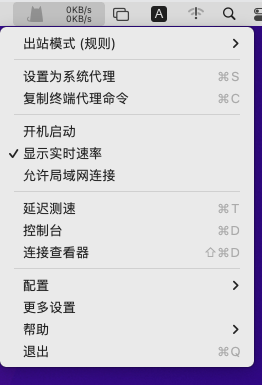
After installation, the ClashX icon appears in the upper right corner. You can click the icon to bring up the menu (after starting ClashX, no window will pop up; instead, a small icon appears in the upper right corner).
ClashX Usage and Configuration Tutorial
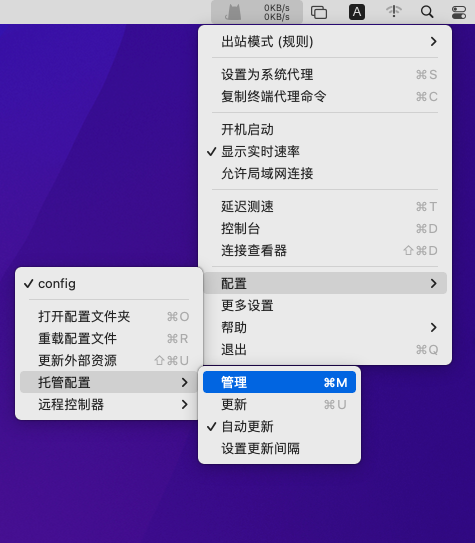
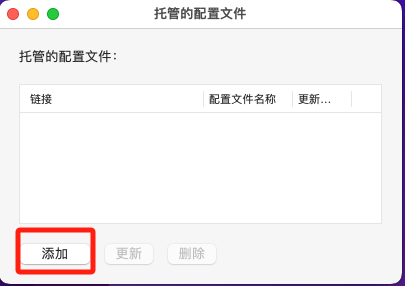
Click the ClashX icon in the upper right corner, then select [Config] – [Managed Config] – [Manage] from the menu.
In the managed configuration file window, click the [Add] button, as shown in the image below:
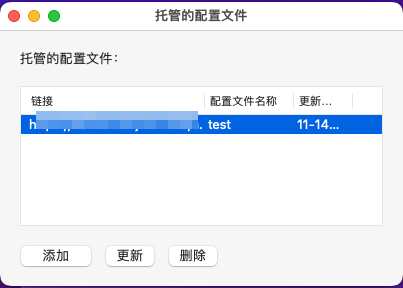
Then, in the URL input field of the pop-up window, paste the URL address provided by your VPN service provider. In the Config Name input field, enter a configuration file name (you can use any name), and click [OK] to complete adding the subscription, as shown in the image below:
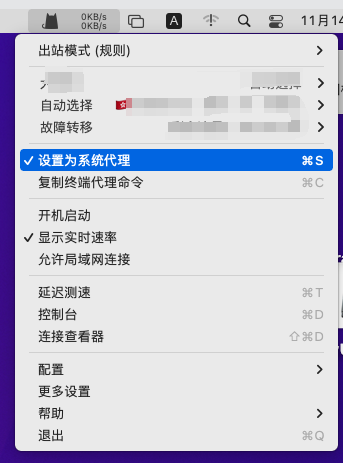
Then, click the ClashX icon that appears in the upper right corner again, bring up the menu, and select [Config] to choose the subscription you just added:
Click the ClashX icon that appears in the upper right corner again, bring up the menu, and select [Set as System Proxy] to start the ClashX system proxy, preparing for scientific internet access. The small cat icon in the status bar at the top has changed from gray to black. When using the proxy for internet access, it will display the real-time speed; you can test it in your browser.
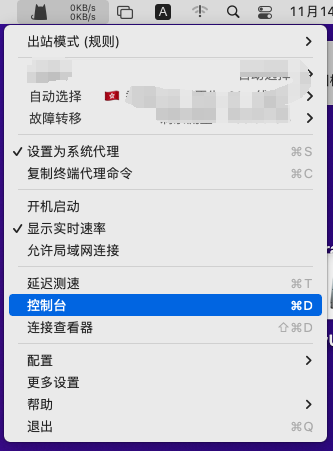
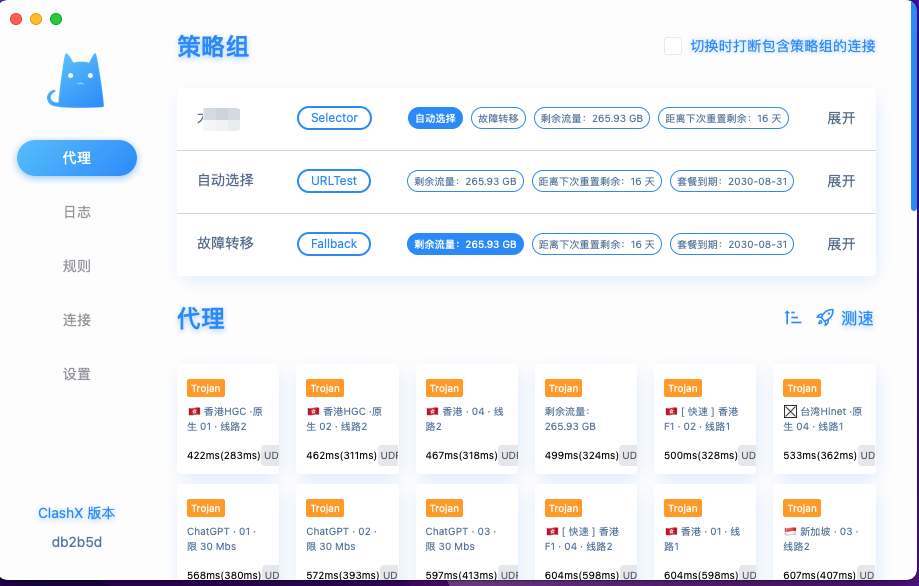
Click the ClashX icon that appears in the upper right corner, bring up the menu, and select [Console]. In the console interface, you can perform more operations such as switching designated nodes and settings, making it more user-friendly, as shown in the image below:
ClashX Pro vs ClashX Comparison
Both ClashX Pro and ClashX are free software. The difference is that ClashX uses the open-source Clash kernel, while ClashX Pro uses the closed-source Clash Premium kernel. Comparing the two, ClashX Pro has more powerful features than ClashX.
| Feature | ClashX | ClashX Pro |
|———|——–|————|
| Open Source | Yes | No (Paid) |
| Core Functions | Basic proxy functions | Advanced proxy and performance optimization |
| Applicable Scenarios | Ordinary users | Professional users, teams/enterprises |
| Update and Maintenance | Community maintenance | Professional team support |
In general, it is recommended that Mac users use the ClashX version, as it is relatively simple to operate and use.